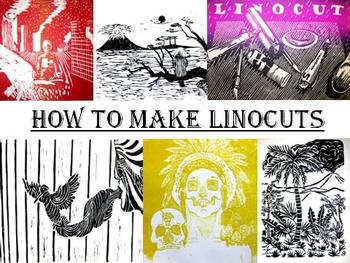
How to Make Linocuts... Linoleum Printmaking
- PDF
- Google Apps™

What educators are saying
Description
*When you download this file you will be able to open it as a PDF, Google Slides Presentation, PowerPoint and more. The PDF will be downloaded first, then simply click on the link in slide #2 to see the presentation in a Google Slides Format. From there you can click File---> Download---> and convert it to PowerPoint or other desired formats.
This Power-point presentation contains 126 slides and well over two hundred images which will teach you and your students how to create their own prints by carving linoleum. It is intended for use as an attention getting introduction to linocuts and is structured for use at the middle school and high school levels (though it could certainly be used at the university level or even the 5th grade if you believe your students are ready). Some of the topics covered are: The four main types of printmaking processes, the basics of relief printing, safety concerns, each step in the process, various linocut artists, careers in printmaking, professional and student examples and much, much more. Below is a closer look at the individual sections within the presentation:
Slides 1-11: look at the four main types of printmaking (relief, intaglio, lithography, and screen-printing) and show plenty of examples of each to highlight their unique differences.
Slides 12-22: take a more in depth look at linoleum cuts, the tools, safety, basics, and working in reverse (how the print ends up backward).
Slides 23-38: take an even more in depth look at the entire process (how to start with a drawing, transfer it to the linoleum, cut it, print it, corrections, drying procedures, and how to edition your prints).
Slides 38-44: show how to make more advanced “Rainbow Prints” by blending colors together.
Slide 45: lists the “criteria” or goals that I asked my own students to try to achieve.
Slides 46-50: show a handful of poor ideas as it relates to making a successful linocut.
Slides 51-73 show plenty of examples of “Good” linocuts, which will motivate your students to put their best foot forward, as well as show them what can be achieved with effort and ambition.
Slides 74-93 take a close look at three influential artists who created linocuts: Elizabeth Catlett, M. C. Escher, and Pablo Picasso. Numerous examples of their artwork is included.
Slides 94-101 show the practical application of creating linocuts and possible career paths one could take, from creating labels and greeting cards, to books, stationary, commercial art and more.
Slide 102: has a few links to YouTube videos which will echo many of the steps and techniques seen within this presentation.
Slide 103-126 show actual student examples of what was achieved in my own classroom. Most of the examples are amazing, while others are basic or even simple. This variety of outcomes can be used to make some students try harder, while others who may lack artistry feel more successful. I use it to highlight what can be done, and what to avoid.
***Note: This presentation does not cover the registration and printing of multi-block prints (these are advanced techniques which will be addressed separately in a future presentation)
I trust that you and your students will enjoy this all-inclusive look at how to make linocuts. By the time you’re done showing this presentation to them, they’ll be eager to begin. I hope you’ll enjoy making beautiful linocuts as much as my students do. Enjoy!
-Bo (The Art Guru)


